
Most wildlife is at its most active after dark, which is exactly when the human eye gives up. Choosing the best night vision for wildlife observation comes down to one decision: do you want to watch animals live through the lens, or capture them automatically while you sleep? This guide walks through both approaches so you can match the right gear to the way you actually observe nature.
Two Ways to See in the Dark
Night vision for wildlife splits into two clear categories, and the best choice depends on your habits rather than on which device has the longest spec sheet.
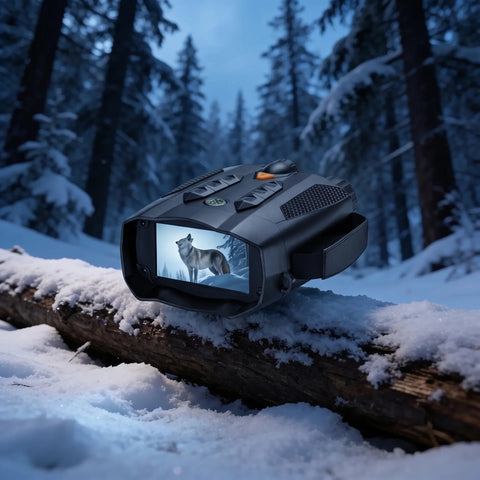
Night vision binoculars are for active, real-time observation. You hold them to your eyes, scan a treeline or clearing, and watch deer, foxes, badgers or owls move in the moment. They are ideal for evening walks, hides, and anyone who enjoys the patience of watching rather than reviewing footage later.
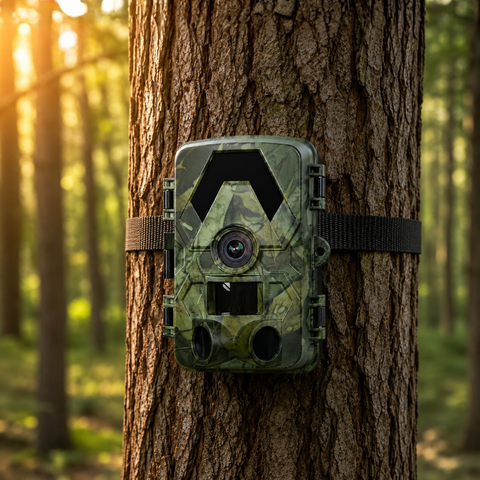
Trail cameras take the opposite approach. You mount one on a tree or post, walk away, and it records wildlife automatically using a motion sensor. When an animal crosses the detection zone, the camera fires and saves 4K video or a 60MP photo, day or night. This is the best route for surveying a large area, monitoring a feeding spot over weeks, or documenting shy species that vanish the moment a human appears.
Which one is right for you?
- You want to watch live — choose night vision binoculars, available in HD, 4K and 4K Pro versions.
- You want to record automatically — choose a trail camera and let it work around the clock.
- You want both — many nature watchers pair binoculars for evenings out with a trail camera left running on a known trail.
What Makes a Trail Camera Good After Dark
If you go the automatic route, a handful of specs genuinely matter for night wildlife. Every SightForest trail camera is built around these fundamentals:
- No-glow infrared illuminates the scene out to roughly 20 metres without emitting any visible red light. This is the single most important feature for wildlife: animals never notice the camera, so behaviour stays natural and you avoid spooking cautious species.
- 4K UHD video and 60MP photos give you enough detail to identify individual animals, count antler points, or read a leg tag.
- A PIR motion trigger detects body heat and movement, firing only when something is actually there — no wasted storage on swaying branches.
- IP66 weatherproofing means the camera shrugs off European rain, frost and humidity through every season.
- A 112–130° field of view covers a wide arc so animals are captured even when they don't walk straight down the trail.
- microSD storage up to 128GB holds weeks of footage locally, with no cloud account required.
Choosing the Right Camera for Your Site
The four SightForest cameras share the same 4K night-vision core. They differ only in how you retrieve the footage, which is entirely a question of where you mount them.
- SD Trail Camera 4K (€99.99) is the fully offline option. It records to a microSD card that you swap by hand. If your observation spot is somewhere you visit regularly anyway, this is the simplest and most affordable choice. See the SD Trail Camera 4K.
- WiFi Trail Camera 4K (€129.99) lets you pull footage to your phone on site via its app, without unmounting the camera — handy for a garden or a spot near the house.
- 4G Trail Camera 4K (€159.99) sends images straight to your phone from remote locations over the cellular network. It uses your own standard nano-SIM (not included) — not an eSIM — and there is no monthly subscription from us, ever.
- 4G Solar Trail Camera 4K (€279.99) adds a built-in solar panel so it can stay out for months without a battery change, ideal for the deep-forest sites you rarely reach.
A quick note on running costs, because it is where many rivals catch people out: SightForest cameras never require a paid plan. The 4G models connect through a standard nano-SIM you supply yourself, so your only ongoing cost is whatever your carrier charges for data. To keep long recordings tidy, a 128GB microSD card is a sensible add-on for any of the four cameras.
Getting the Most from Night Vision in the Field
Good gear is only half the picture. A few habits make a real difference to what you capture:
- Mount at animal height. Around knee to chest height for the target species keeps subjects centred and well lit by the infrared.
- Face away from the rising and setting sun to avoid glare washing out early-morning and late-evening clips.
- Find the trails. Look for tracks, droppings and worn paths, then place the camera along the route rather than out in the open.
- Be patient. Leave a camera in place for at least a week or two — wildlife needs time to accept a new object in its territory before behaving normally around it.
- Keep the lens clear. Wipe off spider webs, condensation and leaves during each visit so the infrared illuminates cleanly.
Buying with Confidence in the EU
Every SightForest order ships from our suppliers with dispatch in around 48 hours and tracked delivery across Europe in roughly 7–9 business days. Each device is backed by a 3-year warranty and a 30-day return window, so you can set up your first camera or binoculars and make sure the results match your expectations.
Conclusion
The best night vision for wildlife observation is the one that fits how you like to watch. Reach for night vision binoculars if you want to be out there in the moment, and choose a no-glow 4K trail camera if you'd rather let the forest reveal itself while you're away. Either way, look for genuine no-glow infrared, real 4K detail, and — crucially — no subscription tying you down. Match the camera's connectivity to your site, mount it on a well-used trail, and give the wildlife time to forget it's there.
