
Watching wildlife after dark is one of the most rewarding parts of being outdoors, but the technology that makes it possible is often misunderstood. Two very different approaches let you see in low light: image-intensifier night vision, the classic green glow, and digital night vision, the technology inside modern trail cameras and consumer binoculars. Understanding how each one works helps you pick the right gear and set realistic expectations for what you'll actually see.
The two ways to see in the dark
Your eyes struggle at night for a simple reason: there isn't enough light for them to form an image. Night-vision devices solve this in one of two ways. They either take the tiny amount of ambient light that already exists and amplify it thousands of times, or they capture light on a digital sensor and use infrared illumination to light up the scene invisibly. The first approach is called image intensification; the second is digital night vision. Both let you see, but they get there through completely different physics.
Image-intensifier night vision
Image intensifiers are the "traditional" night-vision tubes you've seen in films. Faint light from the moon and stars enters the device and strikes a photocathode, which converts incoming photons into electrons. Those electrons are accelerated and multiplied through a component called a microchannel plate, then hit a phosphor screen that glows, producing the familiar green image. Green is used because the human eye distinguishes more shades of green than any other colour, so you perceive more detail.
The strengths of intensifier technology are excellent responsiveness in genuine low light and no visible emissions. The trade-offs are that these tubes are expensive, fragile, generally monochrome, and can be overwhelmed by bright light. They also need at least some ambient light to work well; in complete darkness with no starlight, a pure intensifier struggles.
Digital night vision
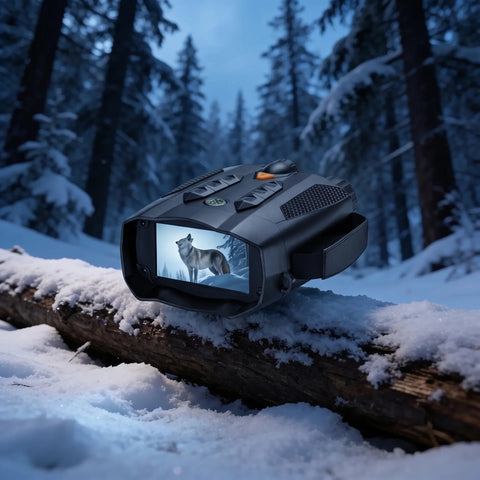
Digital night vision works more like the camera in your phone, tuned for darkness. A highly light-sensitive sensor captures the scene, and an infrared (IR) illuminator floods the area with light at a wavelength the human eye cannot see. The sensor reads that reflected IR light and builds an image on a screen. Because the picture is digital, it can be recorded, viewed on a display, and processed to boost contrast and clarity.
This is the approach used across almost all modern trail cameras and consumer night-vision binoculars. It is more affordable, more durable, and far more versatile than intensifier tubes, and it works in total darkness because the device brings its own IR light source. The main consideration is that IR illumination has a finite range, and lower-cost devices can look grainy. Quality optics and a good sensor make the difference.
How trail cameras see at night
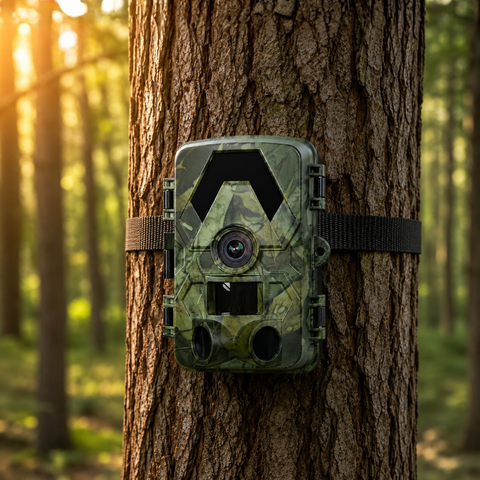
A trail camera is a self-contained digital night-vision system built to run unattended for weeks. When an animal enters the frame, a PIR (passive infrared) sensor detects the change in heat and movement and triggers the camera. At night, an array of infrared LEDs fires to illuminate the subject, and the sensor captures a sharp image or video without any visible flash that could spook wildlife.
SightForest trail cameras use a no-glow IR system, meaning the LEDs emit light at a wavelength that produces no visible red glow at all, keeping the camera discreet. Here is what that looks like in practice across the range:
- 4K UHD video and 60MP photos so daytime clips are crisp and night captures retain usable detail.
- No-glow infrared illumination to roughly 20 metres, letting you cover a feeding area or trail without alerting animals.
- PIR motion trigger for fast, reliable detection with minimal missed events.
- IP66 weather resistance so the camera keeps working through rain, dust and cold.
- 112 to 130 degree field of view to capture wide scenes, plus support for microSD cards up to 128GB.
Because storage matters when you're recording 4K, it's worth pairing any camera with reliable, high-capacity media such as a 128GB microSD card so you don't run out of space between visits.
Choosing the right setup for night observation
The best technology depends on whether you want to record what happens when you're not there or watch in real time. For unattended monitoring, a trail camera is the obvious choice, and the connectivity you pick determines how you retrieve footage:
- The SD Trail Camera 4K stores everything offline on a microSD card, ideal for remote spots with no connectivity, and simplest to run.
- The WiFi Trail Camera 4K lets you review footage on your phone when you're on site, without pulling the card each time.
- The 4G Trail Camera 4K sends captures to your phone from anywhere over cellular. It uses your own standard nano-SIM (not included), and importantly there is no monthly subscription to the camera itself.
- The 4G Solar Trail Camera 4K adds an integrated solar panel for effectively continuous power in sunny locations, again with no subscription tied to the device.
If instead you want to scan the treeline with your own eyes, digital night-vision binoculars let you observe and record in real time, choosing the resolution that matches your budget and how far you need to see. You can also browse the full trail camera collection to compare models side by side.
Conclusion
In short, image intensifiers amplify existing light for a glowing green view, while digital night vision captures a scene with a sensor and lights it with invisible infrared. For wildlife watchers, digital is almost always the practical choice: it's affordable, durable, records footage, and works in complete darkness. Match the connectivity to your location, add enough storage, and you'll be capturing the night with confidence, backed by a 3-year warranty and 30-day returns.
