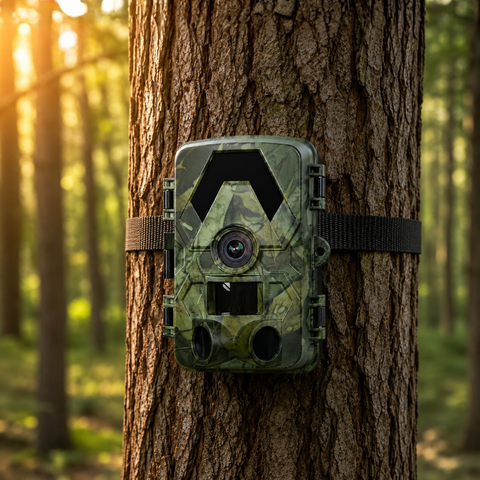

A trail camera only earns its keep when neither wildlife nor passers-by notice it is there. Whether you are monitoring a woodland trail, a garden boundary, or a remote feeding spot, the goal is the same: a clean field of view, undisturbed animals, and gear that stays put. This guide walks through where to mount your camera, how to camouflage it properly, and how to keep it safe from theft.
Where to Place a Trail Camera for Concealment
Concealment starts with position, not accessories. A well-chosen spot does most of the hiding for you and rewards you with better footage. Before you reach for camo tape, think about height, angle, and the natural cover already around you.
- Mount higher than eye level. Fixing the camera around 1.5 to 2 metres up and angling it slightly downward keeps it out of the direct sightline of both animals and people. It also reduces false triggers from low grass moving in the wind.
- Use the tree, not just the trunk. Position the camera against a broad trunk with the lens tucked among branches or bark texture. Broken outlines read as "part of the tree" to a passing deer.
- Mind the sun. Face the camera north (or south in the far north of Europe) to avoid direct sunrise and sunset glare washing out your images and reflecting off the lens.
- Keep the detection zone clear. The PIR sensor triggers on heat and movement across a 112 to 130 degree field of view. Clear a narrow corridor of leaves and twigs directly in front so nothing false-triggers the camera, but leave the surrounding cover intact for concealment.
- Set back from the trail. Placing the camera 3 to 5 metres off a game path, rather than right on it, gives animals room to pass naturally and keeps the unit outside a casual walker's glance.
Because our cameras use no-glow infrared that reaches roughly 20 metres, you do not need to sit right on top of your subject at night. That extra distance is itself a form of concealment: the further back you are, the less likely the camera is to be spotted or disturbed.
Camouflage Techniques That Actually Work
Once the position is right, camouflage is about breaking up the camera's hard, boxy outline and dulling anything that shines. Animals notice silhouettes and reflections far more than colour.
- Break the outline. Tuck sprigs of local foliage, bark, or moss around the housing so the rectangular shape disappears into the background. Use what is growing on the spot so the camo matches the season.
- Match the environment. A camera wrapped in green in an autumn beech wood stands out. Swap in browns and greys as the seasons turn.
- Kill reflections. The lens and any glossy panel are the biggest giveaways. Keep foliage clear of the actual lens and IR window, but dull the surrounding surfaces with matte camo tape rather than anything shiny.
- Secure the strap. Tuck away loose mounting-strap ends. A dangling black strap catches the eye more than the camera body itself.
- Do not over-do it. Never let leaves, spider webs, or tape drift in front of the lens or PIR sensor. Over-camouflaged cameras produce blurred frames and missed triggers. Check the live view before you walk away.
All SightForest cameras carry an IP66 weather rating, so you can leave them tucked into damp foliage through rain and cold without worrying about moisture. That durability lets you commit to a genuinely concealed spot rather than a convenient, exposed one.
Choosing the Right Camera for a Hidden Setup
How you plan to check your footage changes how hidden the camera can stay. The less you need to physically return to it, the less you disturb the site and the lower the chance of being noticed near it.
- Offline microSD. The SD Trail Camera 4K records straight to a microSD card (up to 128GB), which is ideal for fully offline, discreet spots where you are happy to swap cards on a schedule.
- Check without walking up. The 4G Trail Camera 4K sends images to your phone over the cellular network, so you can leave it deeply concealed and rarely visit. It uses your own standard nano-SIM (not included) and, importantly, there is no monthly subscription, ever.
- Set and forget. The 4G Solar Trail Camera 4K tops up its own battery from daylight, meaning fewer trips to change cells and a longer stretch of undisturbed monitoring.
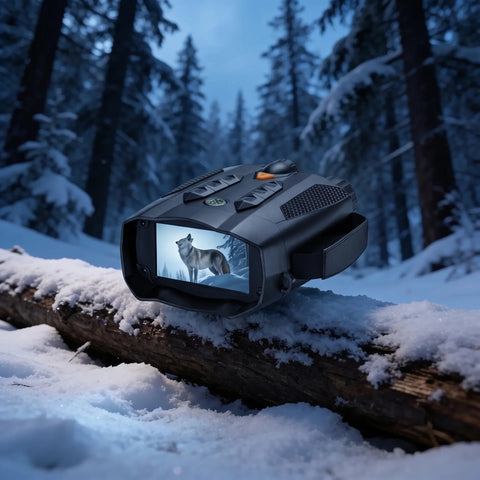
Whichever model you choose, you get the same 4K UHD video and 60MP photos, so hiding the camera never means compromising on image quality. If you want to scout a location before committing a camera, a pair from our night vision binoculars collection helps you find animal trails and natural cover in low light.
Keeping a Hidden Camera Safe From Theft
Concealment protects your footage; anti-theft measures protect your investment. The two work together.
- Mount high and out of easy reach. A camera above head height is harder to spot and harder to grab quickly.
- Add a physical lock. Use a security cable or a lockable metal case, especially on land others can access.
- Prefer connected models for sensitive spots. A 4G camera can send you an image the moment it triggers, so even in a worst case you have a record before anyone reaches it.
- Vary your routine. If you visit to swap microSD cards, avoid arriving at the same time each week and cutting an obvious path to the camera.
Final Checklist Before You Walk Away
Hiding a trail camera well is a balance: enough cover to stay unseen, but a clear lens and sensor so you never miss the shot. Mount it high, break up its outline with local foliage, clear the detection zone, and match your model to how often you can realistically return. Do that, and your camera will keep capturing clean, undisturbed wildlife footage long after you have left the site. Browse the full range in our trail cameras collection to find the setup that fits your location. Every SightForest camera ships with a 3-year warranty and a 30-day return window, so you can dial in the perfect hidden spot with confidence.
