
Mineral licks and bait sites concentrate wildlife activity into a small, predictable footprint, which makes them some of the most productive locations you can put a trail camera. Animals return to the same spot again and again, giving you repeat visits from the same individuals and a real chance to build a patterning picture over a season. The trick is getting the placement, angle, and camera settings right so you record clean detections instead of empty triggers and blown-out night shots.
Why mineral and bait sites are ideal for trail cameras
Unlike a trail or field edge, where animals pass through quickly and unpredictably, a mineral or bait site holds them in one place for minutes at a time. That dwell time is a gift for a passive infrared (PIR) camera: it means more frames of the same animal, better angles, and a far higher chance of a usable identification photo. Over weeks, you can start recognising individual deer by antler growth, coat markings, or body size, and you can log the times of day they appear.
These sites also reward patience. Because activity is concentrated, a single well-placed camera can do the work of several scattered units. That said, a mineral lick or bait pile is a demanding subject: animals come in close, they often feed at night, and they linger, so your settings and hardware matter more than they would on a distant travel corridor.
Placement and camera angle
Getting the physical setup right is more than half the job. A few principles apply almost everywhere:
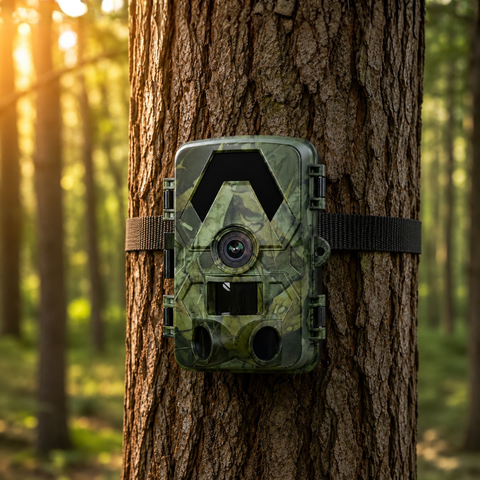
- Mount distance: Position the camera roughly 3 to 5 metres from the mineral or bait site. Too close and animals fill the frame or trip the sensor before you get a full-body shot; too far and detail and night-time illumination both suffer.
- Height and angle: Mount at chest height of your target species, or slightly above, and angle down gently toward the site. This frames the whole animal and reduces false triggers from background vegetation.
- Face north where possible: Point the lens north (or south, in mirror) rather than east or west so the rising and setting sun does not wash out your images or blind the sensor.
- Clear the detection zone: Trim grass, saplings, and branches in front of the lens. Vegetation moving in the wind is the single most common cause of thousands of empty photos.
- Think about wind and scent: Approach and mount from the downwind side, and handle the camera as little as possible so you do not spook cautious visitors.
A camera with a wide field of view (SightForest models cover roughly 112 to 130 degrees) gives you margin for error on framing, so animals that approach from an unexpected direction still land in shot.
Settings that work at feeding sites
Because animals linger and often visit after dark, tune your camera for the conditions rather than leaving it on defaults:
- Photo, video, or both: For pure patterning and identification, high-resolution stills are efficient. If you want to study behaviour or confirm species, use short videos. The 4K UHD sensor with 60MP photo capture on SightForest cameras gives you plenty of detail to crop into.
- Trigger interval: At a site where an animal may feed for several minutes, a moderate interval (say 5 to 15 seconds between triggers) avoids filling the card with near-identical frames while still documenting the whole visit.
- Night-time IR: Feeding often peaks at dawn, dusk, and through the night. A no-glow infrared flash reaching to around 20 metres illuminates close subjects without a visible red glow that can make wary animals nervous. At a bait site the animal is usually well within that range, so night images stay bright and sharp.
- Storage: Concentrated activity fills a card fast. A 128GB microSD (the maximum these cameras support) buys you long unattended runs; a good 128GB microSD card is a cheap way to avoid missing the back half of a busy week.
- Weatherproofing: Licks and bait piles are often in damp, exposed ground. An IP66 rating means the camera shrugs off rain and dust through a full season outdoors.
Choosing the right camera for the location
How you check your footage should drive which model you pick, and that mostly comes down to how far the site is from where you can reach it.
- Close and easy to visit: The SD Trail Camera 4K records everything to a microSD card with no connectivity at all. It is simple, discreet, and completely offline, which is perfect for a lick you walk past regularly.
- Within walking range but you would rather not disturb it: The WiFi Trail Camera 4K lets you pull images to your phone on-site, so you can review a session without opening the housing and leaving scent.
- Remote or hard to reach: A 4G Trail Camera 4K sends images straight to your phone over the cellular network, so you can monitor a distant bait site from home. It uses your own standard nano-SIM (not included) — not an eSIM — and there is no monthly subscription to run it.
- Long-term, unattended monitoring: The 4G Solar Trail Camera 4K adds a built-in solar panel so it can stay on a productive site for months without battery swaps, again with no subscription and your own nano-SIM.
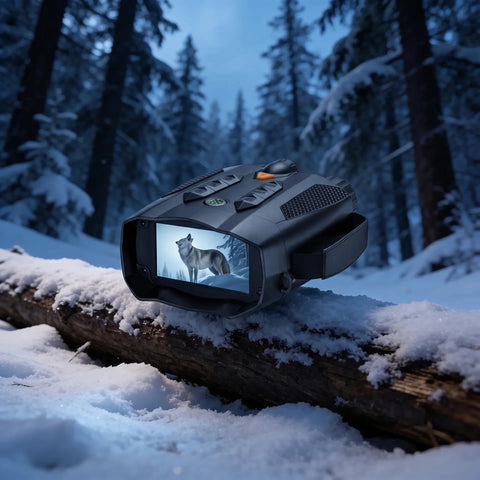
If you also glass the area on foot at dawn and dusk, a pair from the night-vision binoculars collection pairs naturally with a fixed camera, letting you confirm what the camera is picking up without walking in on the animals.
A quick word on responsible and legal use
Baiting and the use of mineral supplements are regulated differently across European countries and regions, and rules can change between hunting and non-hunting seasons. Always check local and national legislation before establishing a bait or mineral site, and make sure you have permission from the landowner. Used responsibly, these sites are also excellent for wildlife observation and photography, not only hunting.
Conclusion
A mineral lick or bait site rewards a methodical setup: mount 3 to 5 metres out, angle down, clear the detection zone, and match your settings to close-range, night-heavy activity. Pick the camera by how you will retrieve the footage — offline SD for spots you visit, WiFi to check on-site, or 4G and solar for anything remote — and give it a large microSD so a busy week never runs out of room. Get those basics right and a single camera will quietly build you a detailed, season-long picture of exactly who is visiting and when. Browse the full trail camera collection to match a model to your site.
