
The most interesting wildlife in European woodlands and gardens moves after dark. Badgers, foxes, deer, pine martens and owls are all far more active at night, which is exactly when a well-placed trail camera earns its keep. This guide walks through how nocturnal capture actually works and how to set up for sharp, natural night footage without disturbing the animals you want to record.
How trail cameras see in the dark
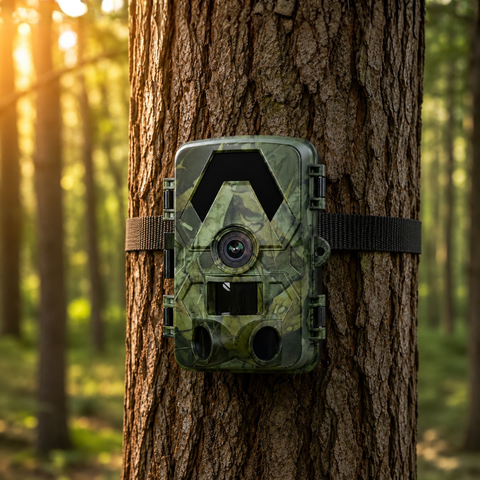
A trail camera photographs nocturnal wildlife using two systems working together: a PIR (passive infrared) motion sensor that detects the body heat of an approaching animal, and an infrared LED array that briefly illuminates the scene so the camera can record it. When a warm body crosses the detection zone, the PIR fires the shutter and the IR LEDs light the frame in a spectrum the animal cannot see.
The key term to understand is no-glow IR. Older or cheaper cameras use low-glow LEDs that emit a faint red glow visible to both animals and people. No-glow (940nm) illumination is effectively invisible, so it does not spook shy species or alert passers-by to the camera's location. Every SightForest trail camera uses no-glow IR with an effective range of around 20 metres, which comfortably covers a game trail, a feeding spot or a garden approach.
At night the sensor records in monochrome, because there is no visible light for colour information. That is completely normal and, if anything, produces the crisp, high-contrast look most people associate with genuine wildlife night footage.
Placement is everything at night
Good night captures come from placement far more than from settings. A few principles make a large difference:
- Mount at animal height. Roughly 40-60 cm off the ground suits foxes, badgers and deer. Aim the lens along a trail rather than across it, so animals stay in frame longer and the PIR has more time to trigger.
- Respect the IR range. Keep the expected subject within about 20 metres. Beyond that, no-glow illumination falls off and your subject disappears into darkness. Frame a specific approach point rather than a wide open field.
- Clear the foreground. Grass, twigs and leaves close to the lens reflect IR light and cause bright blown-out blur. Trim anything within a metre or two of the camera.
- Mind false triggers. The PIR reacts to moving heat, so avoid pointing at sun-warmed rocks, busy branches or west-facing backgrounds that shift temperature at dusk. Fewer empty clips means longer battery life and less card clutter.
- Angle away from direct light sources. Streetlights or a low moon in frame can fool the exposure. Position the camera so background light stays out of shot.
With a 112-130 degree field of view, these cameras give you a wide detection arc, but the sharpest, brightest results always sit in the centre of the frame within IR range.
Settings that suit nocturnal capture
Once the camera is well placed, a handful of settings tune it for night work. All SightForest trail cameras shoot 4K UHD video and 60MP photos, so you have plenty of detail to work with.
- Photo plus video. A short photo burst followed by a video clip gives you a clean still for identification and footage for behaviour.
- Trigger interval. A short interval (a few seconds) captures more of a passing animal; a longer one conserves the microSD card and battery on busy sites.
- Night sensitivity. If you get motion blur from fast-moving foxes or deer, raise the shutter/sensitivity toward the faster setting to freeze movement, accepting slightly darker frames.
- Storage. 4K night footage fills a card quickly. A dedicated 128GB microSD card holds weeks of clips, and every model supports up to 128GB.
All units are rated IP66, so rain, dew and cold European nights are not a concern. Fresh batteries still matter, though: cold weather drains cells faster, and IR bursts are power-hungry, so start each deployment with a full set.
Choosing the right camera for night work
Every SightForest model captures nocturnal wildlife the same way; the difference is how you retrieve the footage. There is no monthly subscription on any model, which keeps long-term running costs at zero.
- The SD Trail Camera 4K (€99.99) records to microSD and is fully offline. It is ideal for remote spots you visit regularly to swap the card.
- The WiFi Trail Camera 4K (€129.99) lets you pull footage to your phone on site via its app, perfect for a garden or a location you can walk up to.
- The 4G Trail Camera 4K (€159.99) sends captures to your phone over cellular, so you can monitor a distant site without visiting. It uses your own standard nano-SIM (not included and not an eSIM).
- The 4G Solar Trail Camera 4K (€279.99) adds a solar panel for effectively unlimited runtime, which suits long unattended night surveys. It also takes your own standard nano-SIM (not included).
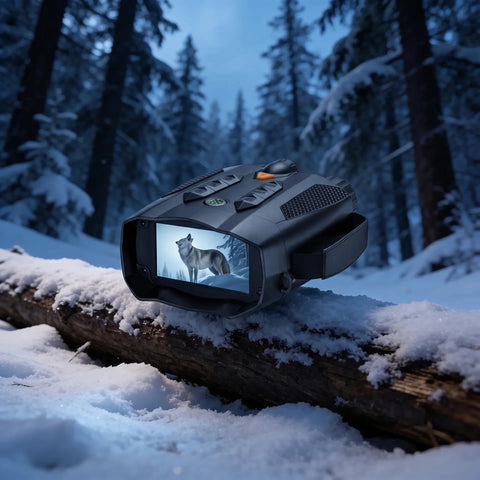
If you would rather observe live rather than leave a camera in place, our night vision binoculars let you watch nocturnal animals in real time and are a natural companion to a trail camera setup. You can compare the full range in the trail camera collection.
A simple night-capture routine
Start by picking one clear approach a nocturnal animal is likely to use, mount the camera at the right height within IR range, clear the foreground, and load a fresh card and batteries. Leave the site undisturbed for several nights rather than checking constantly, since your own scent and presence can keep shy species away. Then review, adjust the angle if needed, and refine.
Nocturnal wildlife photography rewards patience and good placement more than expensive gear. With a no-glow trail camera set up thoughtfully, you will start seeing the animals that share your patch of Europe under the cover of darkness, and every SightForest camera ships within about 48 hours, arrives on tracked delivery in 7-9 business days, and is backed by a 3-year warranty and 30-day returns.
