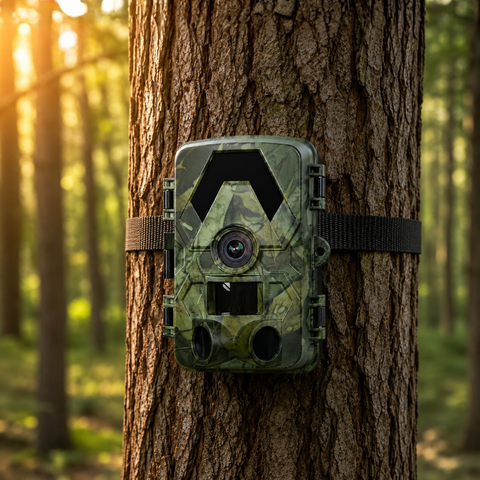

Few things are more frustrating than checking your phone all week and seeing an empty inbox from a camera you know is triggering. When a trail camera stops sending photos, the cause is almost always one of a handful of well-known culprits — and most of them you can fix yourself in a few minutes. This guide walks through nine practical checks, starting with the cellular questions that trip up most 4G camera owners, then moving on to power, storage and settings.
First, confirm what "sending" means for your camera
Not every trail camera transmits images the same way, so the fix depends on the model you own. A 4G cellular camera sends photos over a mobile network to an app or email, anywhere it has coverage. A WiFi camera only transfers images to your phone when you are standing next to it, over a short-range connection. And a pure SD (offline) camera never sends anything at all — you retrieve the footage by pulling the microSD card.
If you expected remote delivery but bought an SD or WiFi model, the camera is behaving exactly as designed. For true remote delivery from the field with no monthly subscription, you want a cellular unit such as the 4G Trail Camera 4K or the solar version. If you already own the right camera and it has simply gone quiet, keep reading.
9 fixes when a 4G trail camera won't send photos
1. Check the nano-SIM is seated and active
Cellular cameras need your own standard nano-SIM (not included) — a normal physical SIM from any mobile carrier, not an eSIM. Power the camera off, remove the SIM, and reseat it firmly in the correct orientation. Confirm the SIM is activated, has an active data plan, and is not PIN-locked. A brand-new SIM sometimes needs to be inserted into a phone once to complete activation before it will carry data in a camera.
2. Verify there is enough mobile signal at the camera's location
A spot deep in woodland or a valley can have almost no coverage even if your phone works fine at home. Bring the camera to where you plan to mount it and check its signal-strength indicator before you leave. If signal is weak, try:
- Mounting the camera higher on the tree or post
- Rotating it so the antenna faces the nearest town or mast
- Using a carrier known for strong rural coverage in your country
- Fitting an external antenna if your model supports one
3. Confirm the data plan actually has credit and data left
Photos and especially video use data. A prepaid SIM that has run out of credit, or a plan whose monthly data allowance is exhausted, will stop uploads silently while the camera keeps taking pictures to the card. Log into your carrier account and check the remaining balance. Sending full-resolution 4K stills eats more data than smaller preview images, so match your plan to how often the camera triggers.
4. Re-enter the APN and network settings
The APN (Access Point Name) tells the camera how to reach your carrier's data network. If it is blank or wrong, the camera has signal but cannot get online. Find your carrier's APN details on their website and enter them exactly in the camera's setup menu or companion app. After saving, restart the camera so it re-registers on the network.
5. Check power — low batteries throttle transmission first
Uploading over 4G draws more power than simply taking a photo, so a camera with tired batteries often keeps capturing images to the card but stops sending them. Fit a fresh set of quality lithium batteries, or if you want to remove this failure mode entirely, consider the 4G Solar Trail Camera 4K, which keeps its cell topped up from daylight so transmission does not stall between visits.
6. Make sure a microSD card is installed and healthy
Most cellular cameras write each image to the microSD card first, then upload it. No card, a full card, or a corrupted card can quietly block sending. Insert a working card (these models take up to 128GB microSD), and format it in the camera — not on your computer — so the file system matches. A fresh, correctly formatted card resolves a surprising share of "not sending" reports. A reliable 128GB microSD card gives you plenty of headroom.
7. Review the send mode and daily limits in settings
Many cameras include settings that intentionally reduce how much they send — an instant-versus-daily-report mode, a cap on the number of images per day, or a scheduled quiet window. If you set a low daily limit, the camera stops once it is reached and resumes the next day. Open the settings and confirm the send mode, daily quota and any time schedule match what you actually want.
8. Confirm the app, email and recipient details are correct
The camera can be online and still send to the wrong place. Double-check that the recipient email or app account entered in the camera matches the one you are watching, and look in spam or junk folders in case delivery is being filtered. If you use a companion app, make sure notifications are enabled on your phone and that the camera is still linked to your account.
9. Restart, update and reset as a last resort
If everything above checks out, power the camera fully off and on to force a clean network re-registration. Apply any available firmware update, since these often improve connection stability. As a final step, note your settings, perform a factory reset, and re-enter the SIM, APN and recipient details from scratch — this clears any corrupted configuration that built up over time.
When it isn't a fault at all
Sometimes the camera is working perfectly and the environment is the limiting factor. Dense tree cover, being sited in a signal dead-zone, extreme cold slowing batteries, or simply no animals passing during a quiet stretch can all look like a failure. Before assuming the hardware is broken, trigger the camera yourself by walking in front of it and confirm that test image arrives. If it does, the delivery chain is intact.
It is also worth remembering what each camera type is for. A WiFi model is ideal near the house where you retrieve images on-site, an SD model suits set-and-forget spots you visit in person, and a 4G model is the one you rely on for remote alerts. You can compare the full range in the trail camera collection. Every SightForest camera ships with a 3-year warranty and a 30-day return window, and none of them ever needs a monthly subscription.
Conclusion
Work through these fixes in order and you will usually restore delivery within a few minutes: confirm the camera type, check the nano-SIM and signal, verify data and power, then review the send settings and recipient details. Keep the SIM active and the batteries fresh, format a good microSD card in the camera, and send yourself a test image after every setup. Do that, and an empty inbox becomes the exception rather than the rule.
