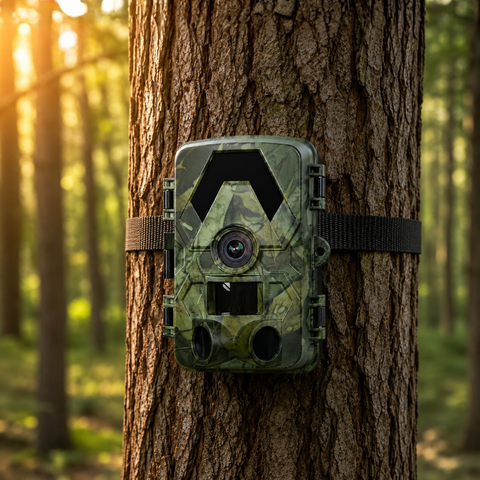

Whitetail deer are creatures of habit, and a well-placed trail camera is the most reliable way to learn those habits without ever setting foot in the woods at the wrong moment. Get the setup right and you build a season-long picture of which deer are moving, when, and where. Get it wrong and you either miss the action or, worse, alert a mature buck to your presence. This guide walks through the placement, height, angles and camera settings that turn a trail camera into a genuine scouting tool.
Where to place your camera
Location does more for your results than any single setting. Whitetails follow predictable travel corridors between bedding and feeding areas, and your job is to find the pinch points where that movement concentrates. The best early-season spots are the transition zones deer use daily, while the pre-rut and rut demand a different approach focused on where bucks are searching for does.
- Field edges and food plots: reliable for volume, especially in summer and early autumn when deer feed on a consistent schedule.
- Trail intersections and funnels: saddles, creek crossings, fence gaps and the narrow strips of cover between two open areas force deer into a predictable path.
- Scrapes and licking branches: during the pre-rut, an active scrape is one of the most productive setups on the property, day and night.
- Water sources: underrated in warm weather and in areas where water is scarce.
Approach every site with the wind in mind. Access the camera from the downwind side, keep your visits short, and consider wearing gloves when handling the unit. A mature buck that scents human intrusion on a key trail will simply reroute.
Height, angle and distance
Mounting details are where most setups quietly fail. The common instinct is to strap the camera at chest height and point it straight down the trail, but that invites two problems: too many empty triggers from the camera facing along the path, and blown-out flash photos of animals passing too close.
- Height: mount roughly at deer chest level, about 60 to 90 cm off the ground for most whitetail setups. If you are trying to keep the camera out of sight or reduce the chance of a curious deer staring into the lens, mount higher and angle the unit downward.
- Angle to the trail: position the camera at a slight angle to the path rather than perpendicular to it. This gives the passive infrared (PIR) sensor time to detect the deer and fire before it walks out of frame, which matters most for fast-moving animals.
- Distance: aim for a detection zone of three to six metres. With a 112 to 130 degree field of view you cover a wide arc, but keeping subjects at a sensible range avoids overexposed night shots and improves your odds of a usable photo.
- Clear the frame: trim branches, tall grass and anything that moves in the wind within the detection zone. Vegetation warmed by the sun and swaying in a breeze is the number one cause of false triggers and a drained battery.
Do a quick walk test after mounting. Trigger the camera by walking through the zone at deer height, then check the capture to confirm the framing and timing before you leave.
Choosing the right camera and settings
How you plan to check the camera should drive which model you buy. If your ground is close to home and you can pull the card in person without disturbing deer, an offline unit is simple and dependable. If the spot is remote or you want to minimise intrusion during the season, a connected camera earns its place. Every camera in the SightForest trail camera range shoots 4K UHD video and 60MP stills with no-glow infrared out to around 20 metres, so you get clean daytime detail and discreet night images that won't spook deer.
- SD Trail Camera 4K (€99.99): fully offline, records to microSD, ideal for spots you can walk to without pressuring the herd.
- WiFi Trail Camera 4K (€129.99): review footage on your phone via the on-site app when you are near the camera, so you skip removing the card.
- 4G Trail Camera 4K (€159.99): sends images to your phone from remote stands over cellular. It uses your own standard nano-SIM (not included) and never charges a monthly subscription.
- 4G Solar Trail Camera 4K (€279.99): the same cellular convenience with a built-in solar panel for near set-and-forget running through a long season.
Whichever model you choose, dial in the settings for deer. Use a PIR trigger with a short delay so you catch a deer entering and, if it lingers, feeding. A one to three second delay between triggers balances detail against card space and battery life. Fit a high-capacity card such as a 128GB microSD card if you shoot 4K video, since UHD clips fill storage quickly. All units are IP66 rated, so rain and cold are not a concern, but always confirm the date and time stamp is set correctly, your scouting is only as good as the timestamps behind it.
Reading the data and patterning bucks
A camera is a data collector, not a decoration. The real value comes from reviewing captures over weeks and looking for patterns rather than reacting to a single exciting photo. Log the time of day, wind direction and moon phase alongside each notable buck sighting. Over a season you will start to see which deer move in daylight, which are strictly nocturnal, and how movement shifts as the rut approaches.
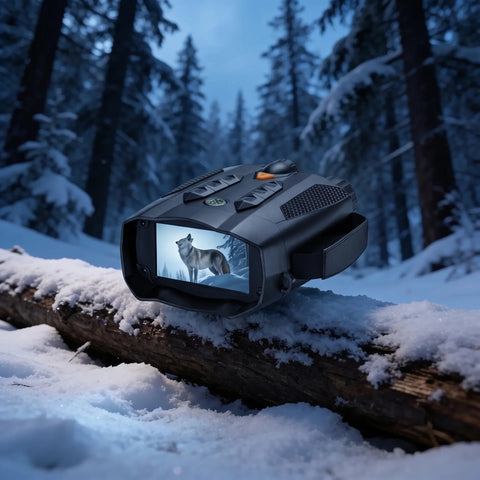
Resist the urge to check cameras too often. Every visit leaves scent and disturbance, and the most common mistake hunters make is over-pressuring a good spot. On cellular units you sidestep this entirely by letting images come to you. If you are pairing camera intel with in-person observation, a set of night-vision optics from the SightForest night vision collection lets you confirm movement at last light without walking in on bedded deer.
Final thoughts
A trail camera set up with care, at the right height, at a slight angle to a well-chosen trail, with clean framing and sensible settings, does the scouting you cannot do in person. Match the model to how you will check it, keep your intrusion low, and treat every capture as one data point in a larger pattern. Do that consistently and by the time the season peaks you will not be guessing where the deer are, you will know. Every SightForest camera ships within about 48 hours with tracked delivery in 7 to 9 business days, backed by a 3-year warranty and 30-day returns, so you can get set up well before the rut.
