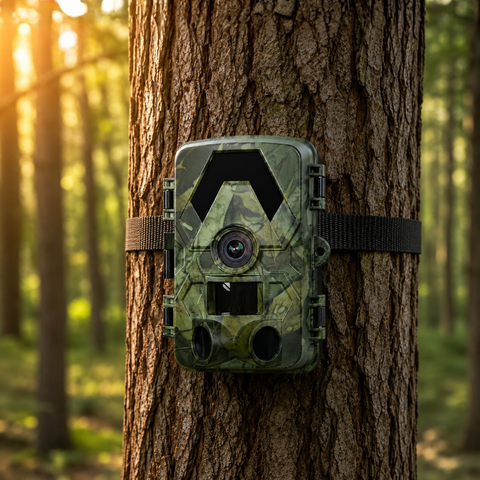
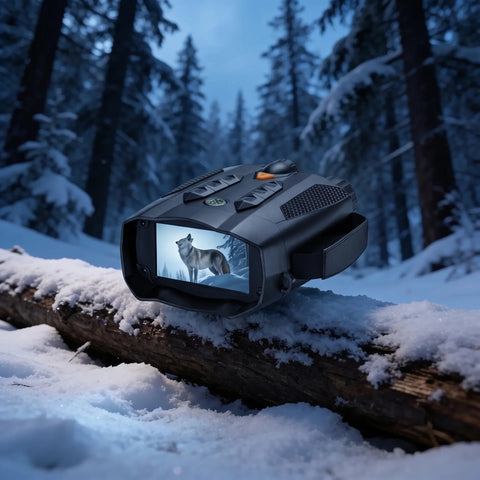

A trail camera left in the field is a small, valuable device sitting alone in the woods, sometimes for weeks at a time. Whether you run cameras on private land, a hunting lease, or a remote nature plot, theft and tampering are real risks worth planning for. The good news is that a few inexpensive accessories and smarter placement habits dramatically reduce the chance of losing your gear.
Why Trail Cameras Get Stolen (and How to Think About It)
Most trail camera theft is opportunistic. Someone walking a trail spots a camera at eye level, realises it is unsecured, and simply unstraps it. Deterrence works because thieves want the easy grab, not a fight with a steel box and a padlock. Your goal is not to build an impenetrable fortress but to make your camera the least attractive, most time-consuming target in the area.
Think in layers. No single lock stops a determined thief with tools, but each layer adds time, noise, and effort. Combine physical security with clever placement, and you shift the odds heavily in your favour.
The Core Anti-Theft Toolkit
Here are the accessories that make the biggest difference, roughly in order of value:
- Security box (metal housing): A steel case that bolts or straps around the camera, exposing only the lens, IR array, and PIR sensor. This is the single most effective deterrent. Buy the box model that matches your exact camera dimensions so the lens and no-glow IR window line up cleanly.
- Python cable lock: An adjustable, key-locked steel cable that loops around the tree and threads through the camera or security box. It resists casual knife and hand attacks far better than the nylon strap alone.
- Master padlock for the box: Many security boxes have a hasp or lock point. A weather-resistant padlock keeps the box closed so a thief cannot simply open it and lift the camera out.
- Lag bolts and a socket: Instead of strapping to a tree, some boxes let you screw directly into the trunk with lag bolts, which cannot be unbuckled by hand.
- Tree-mount brackets: Adjustable mounts get the camera higher and angled down, out of easy reach and out of the natural line of sight.
Placement: The Free Security Upgrade
Hardware matters, but where and how you mount the camera is just as important, and it costs nothing.
- Go high, angle down. Mount the camera 2.5 to 3 metres up on the trunk and tilt it downward. A thief needs a ladder or climbing sticks to reach it, and most people never look up. This works especially well because our cameras have a wide 112 to 130 degree field of view, so you still capture the trail even from a steep angle.
- Break the silhouette. A boxy shape at eye level reads instantly as a camera. Higher placement and a bit of natural cover from branches make it far less obvious.
- Avoid the obvious tree. Skip the perfect trail-junction tree everyone walks past. Mount slightly off the path where a passer-by has no reason to look.
- Mind the IR at night. Our cameras use no-glow IR reaching to roughly 20 metres, which produces no visible red glow when triggered, so the camera does not announce itself to anyone standing nearby in the dark.
- Record the serial number. Photograph the box and note the serial before deployment. If a camera is ever recovered, proof of ownership helps.
Choosing the Right Camera for a Theft-Prone Spot
Your connectivity type changes your exposure. Here is how it plays out across the range:
- SD (offline) cameras store everything to a microSD card, so you must physically visit to swap cards. If that camera is stolen, the footage goes with it. Higher placement and a locked box matter most here. The SD Trail Camera 4K at €99.99 is also the most affordable to replace if the worst happens.
- WiFi cameras send images to your phone when you are on site, useful for checking a camera without walking up to it and revealing its position.
- 4G cellular cameras are the strongest anti-theft choice. Because they upload images off-site over the mobile network, you keep every photo even if the hardware disappears, and you often see the thief. The 4G Solar Trail Camera 4K at €279.99 adds a solar panel so you rarely need to visit, reducing how often you disturb the site. Both 4G models run on your own standard nano-SIM (not included), and there is no monthly subscription of any kind.
Whatever you choose, every SightForest camera shoots 4K UHD video and 60MP photos, carries an IP66 weather rating, and supports microSD cards up to 128GB. If you want a card sized for long unattended runs, the 128GB microSD card keeps weeks of captures on a single swap. You can compare the full lineup in the trail camera collection.
A Simple Deployment Checklist
- Fit the security box before you leave home and test that the lens, IR, and PIR sensor are unobstructed.
- Mount high and angled down, off the obvious trail.
- Thread a python cable lock through the box and around a solid trunk.
- Lock the box hasp with a weatherproof padlock.
- Note the serial number and, for 4G models, confirm images are uploading before you walk away.
Trail camera theft is a manageable risk, not an inevitability. A steel box, a cable lock, and thoughtful high placement will defeat the vast majority of opportunistic grabs, and choosing a 4G camera means you keep your footage even in the rare case the hardware walks off. Spend a little on security up front and your camera stays where it belongs: quietly watching the wild. Every SightForest camera is backed by a 3-year warranty and 30-day returns, so you can set it up in the field with confidence.
