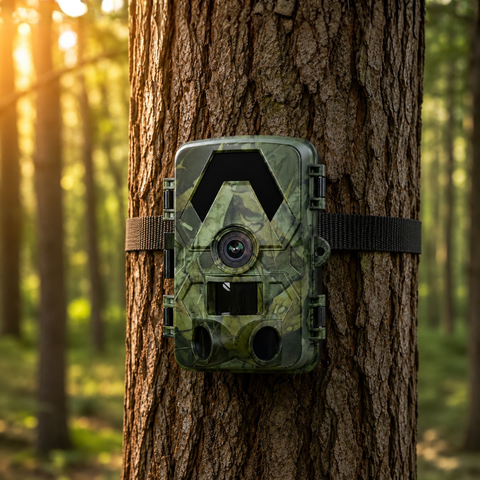

Your garden is busier at night than you might think. Long after the lights go out, hedgehogs shuffle along the fence line, foxes cut across the lawn and moths, mice and the occasional owl pass through unseen. A trail camera lets you finally watch it all unfold, capturing sharp footage of the visitors you would otherwise sleep straight through. This guide explains how to choose and place one so your garden becomes a nightly wildlife documentary.
Why a trail camera beats standing and waiting
Garden wildlife is shy, patient and mostly nocturnal, which makes it almost impossible to observe in person without scaring everything away. A trail camera solves this by staying still, silent and endlessly patient on your behalf. It uses a passive infrared (PIR) sensor to detect the body heat and movement of an animal, then triggers a photo or video the moment something walks into frame.
The results are better than most people expect. A good camera records in 4K UHD video with 60MP photos, so you can actually identify individual hedgehogs by their markings or watch a fox investigate a scent in real detail. At night, a no-glow infrared array reaches roughly 20 metres without emitting any visible light, so animals are never startled by a flash and behave completely naturally. That is the whole point: you see genuine behaviour, not a spooked blur disappearing over the wall.
Choosing the right camera for your garden
The best model depends less on your garden and more on how you want to check the footage. Every SightForest trail camera shares the same core specs, so the decision really comes down to connectivity. Here is how the range breaks down:
- SD Trail Camera 4K (€99.99) — fully offline. It records to a microSD card and you swap the card to view your clips. Simple, private and ideal if the camera sits near the house where collecting the card is no hassle.
- WiFi Trail Camera 4K (€129.99) — connects to a phone app when you are standing nearby, so you can review and download footage on-site without pulling the card. Perfect for a fixed spot like a feeding station or a nesting box you check regularly.
- 4G Trail Camera 4K (€159.99) — sends images and alerts straight to your phone from anywhere over the mobile network. It uses your own standard nano-SIM (not included, and it is a normal nano-SIM, never an eSIM), so you can watch a far corner of the garden or an allotment without ever visiting it.
- 4G Solar Trail Camera 4K (€279.99) — the same cellular convenience with a built-in solar panel, so it can run for months in a sunny position without a battery change. Best for permanent, hard-to-reach placements.
Crucially, none of these cameras carries a monthly subscription. The cellular models simply use a SIM you already have data on, and there are no ongoing platform fees to unlock your own footage. You can compare the full line-up in the trail camera collection and match the connectivity to how often you can realistically reach the camera.
What the specs mean in practice
Beyond resolution, a few figures matter for garden use. A wide 112 to 130 degree field of view means you cover most of a border or lawn from a single fence post. An IP66 weatherproof rating lets the camera live outdoors year-round through rain and frost. And support for microSD cards up to 128GB gives you weeks of overnight recording before you need to clear space. If you plan to record in 4K regularly, a roomy card is worth having from day one; a 128GB microSD card holds a great deal of high-resolution footage without constant offloading.
Getting great footage: placement and settings
Where you mount the camera matters more than any single setting. A little planning transforms your hit rate.
- Mount at animal height. For hedgehogs and foxes, that means roughly 30 to 50 cm off the ground, angled slightly downward. Mounting too high sends the PIR sensor over the top of low animals and misses them entirely.
- Watch the trigger zone, not the scenery. Point the camera along a fence line, hedge base or the gap animals use to enter, rather than across open lawn. Wildlife follows predictable routes, so aim at the highway.
- Avoid facing the sunrise. A camera pointed east or west can be blinded by low sun and triggered by warming foliage. North-facing placements give steadier daytime footage.
- Clear waving branches. Grass and twigs moving in the wind can trip the PIR sensor and fill your card with empty clips. Trim the frame before you walk away.
- Use short video clips with a brief interval. For a busy garden, 10 to 20 second clips capture the behaviour without burning through storage, while a short retrigger delay stops one lingering hedgehog from generating a hundred files.
A little patience pays off. Give the garden a few nights to settle after you install the camera, since animals notice change, and resist the urge to check it every morning if that means tramping through the trigger zone.
Seeing wildlife with your own eyes
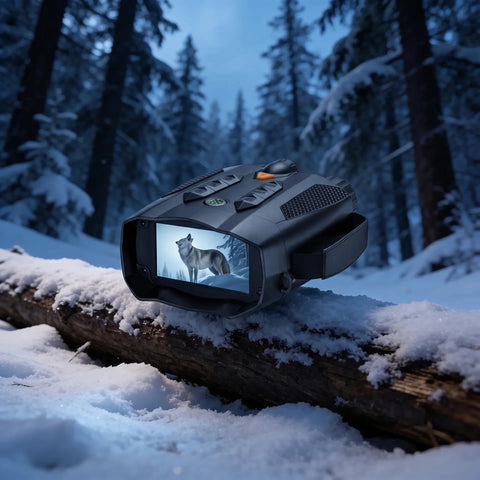
A trail camera is brilliant for recording, but sometimes you want to watch live. If you enjoy sitting out at dusk to catch a fox in the act or scan the treeline for owls, night-vision binoculars are the natural companion to a fixed camera. You can browse the night-vision binoculars collection for HD, 4K and 4K Pro options that let you observe in real time while your trail camera keeps recording in the background.
Conclusion
A trail camera is one of the most rewarding pieces of kit a wildlife hobbyist can own, turning an ordinary garden into a nightly show you can actually watch back in 4K. Start by matching the connectivity to how easily you can reach the camera, mount it low and along an animal route, and give the garden a few quiet nights to reveal its regulars. Every SightForest camera ships with a 3-year warranty and a 30-day return window, dispatches within about 48 hours and arrives on tracked delivery in 7 to 9 business days, so you can be filming hedgehogs before the month is out.
